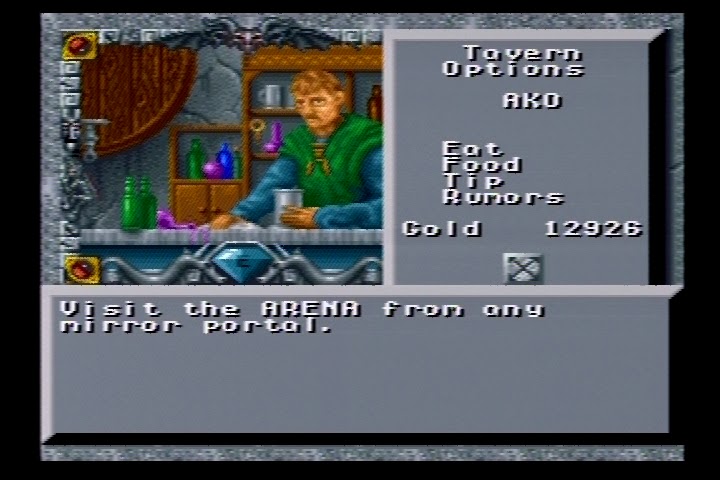
Tuesday, July 25, 2017

Game #71: Might and Magic III: Isles of Terra (SNES) - A Port for Whining

This item definitely sounds like it would be cursed in any other game
It felt good to finally make progress. So good, that I spent more than double my normal play time this past week. With all that time, I've come to realize that this port, on the SNES, is the worst way to experience this game. The lag between movement or actions make it nearly unplayable. There are even times when the game will appear to freeze, not accepting any commands (although the mouse cursor still moves), then up to 40 seconds later it will finish whatever processing it was doing and resume the game. Enemies seem to have been rebalanced in strange ways (e.g. goblins are pushovers, but orc warriors will obliterate a low level party two steps later). Hirelings no longer have their own slots, and instead take up one of the six party slots, so they've become useless.
Beating the first quest leads to more quests, these much more vague
Despite all that, I'm enjoying the game. After finding enough silver skulls I returned them to Skull Miser. He gave me a password to get further in the dungeon, and after finding a few secret passages I faced off against the rat overlord. Releasing Morphose revitalized the fountains, which now produced strange riddle-like quests (e.g. "With the presentation of one past ten, two shall be forever vanquished. Their strongholds felled and kingdoms barren, Your title of Champion established.") I now need to branch out into the world, discover its secrets, and decide its fate.
This is going to take a while
In the dungeon under Fountainhead I found a statue that taught everyone how to swim. Using that I traveled along the river, then cleared out the tall grass sections in A2. The map is cut into sections up to F4. The first isle stretches through all of A and parts of B columns. Castle Whiteshield, shown on the map above, didn't allow me access until I had the crusader title (something a paladin would start with, so that's one benefit to that class). Baywatch, the second town, offered up the skills of Mountaineer and Pathfinder, which allowed the party to cross mountains and forests (respectively) if two or more characters had the skill. Using these two I increased my riches 10 fold as there were many hidden caches of gold, gems, and items. Those skills also allowed me to take out many monsters from safety as I fired arrows down on them in the next square while they were unable to scale the mountainside.
Another example of Nintendo of America censorship
The next major quest line I followed started with someone named Alpha in Baywatch, then Beta in the caverns below, next Gamma in Wildabar (which took some time to locate), Delta below that town, and finally Zeta in the Arachnoid Cavern. Connecting all the messages suggested I could find a small island south of Castle Blackwind where a portal opened only on the 99th day of each year that would spit out a sea shell stolen from Athea, a siren of the sea. While I waited for that day I continued my adventures. I found a boat ride to Swamp Town.
This game sure loves its riddles; I have yet to solve this one
Beyond combat, which has either been incredibly easy or impossibly hard, the game offers up riddles that often require piecing together in order to solve. Inside the Arachnoid Cavern were lords that had a math problem involving features of the Cavern including the number of crystals, gongs, and thrones. Once solved, Lord Might (who was the only lord not named directly) rewarded the party with 1 million experience, and offered to recharge the crystals there that conferred stat bonuses for 5,000 gems (I have nowhere near that amount). Each of the castles (Whiteshield, Free Reign, and Dragontooth) have passwords locking their dungeons with riddles throughout the castle that lead to the answer.
There's a general lack of skill description; not even in the manual, I have to guess what benefits the navigator skill imbues, and how many characters should have it
After exploring B1, which had many fountains that temporarily raised stats for a day, I've fallen into a pattern of hitting each fountain before entering a dungeon. It's made progressing much easier, so long as my entire party doesn't get paralyzed/stoned/immobilized in some way. I've mainly been exploring locations mentioned by hints, but eventually needed to start branching out into the other dungeons, like the one near Fountainhead that granted everyone the crusader skill. With Lloyd's Beacon learned by both my archer and sorcerer, it's been much easier to set a point at the dungeon, teleporting back to Fountainhead to gather all the buffs before porting back to the dungeon. I suspect the game will progress faster now.
A snake munches the display when the party dies; I'm not even sure how they died here since I can't check character status in combat, and character portraits don't change with status effects like DOS -- my best guess is gargoyles turn characters to stone on touch
One of the more bothersome aspects to this game is the inventory. After completing the brother's quest, I found myself holding a Quatloo Coin from each of them. They're worth 0 gold, so they might turn out useful for a quest, but take up 5 slots I could otherwise use. Add in other quest items like keys for dungeons, artifacts to return to each of good, neutral, and evil castles, plus the ultimate power orbs that I later need to decide who to give them to... it's a bit overwhelming to manage considering all my armor pieces plus the ability to wear 10 rings and 4 medals. Each character has 14 item slots. I really wish the bank had a vault for these. Maybe there's a pack mule skill that will allow them to carry more.
The way these posts are situated on top makes me think there's some kind of hidden message
My biggest victory so far was fully exploring under Swamp Town, and returned the evil artifacts I found there to Castle Dragontooth. The caves below had some strange trap that looked like electrical fields; however, no matter what elemental protection I enabled, it still did 50 HP per hit. I managed it without many buffs at the time because I had tried to teleport, which failed, so I figured Lloyd's Beacon wouldn't work either (later found out it does). I rested before each trap, bashed the wall in front of it, was attacked, then the trap triggered again after combat before I could move. Those enemies behind each wall also magically aged characters with every hit, which meant I couldn't drag out combat to heal. I admit, I saved and loaded after every successful step forward.
I'm not sure what Born: 2/482 means, but he took a hit and magically aged... characters can die from old age
At the end of two different passages I found altars. I paid homage to the goddesses, and was granted a boon to strength for one and endurance for the other. The remaining dungeon served up treasures as well, but those stat increases were the best rewards. If only I could find such altars for speed.
These were permanent increases, well worth the extra years
With my extra endurance I spent some time in the Swamp Town tavern where I picked up all the tips. One provided the mirror portal password to Blistering Heights, the final town. I noted that I should go back to each town's tavern to ensure I have all the clues. On the 99th day I picked up the shell, and returned it to Athea for a large reward that left the male characters with an In Love state. I then randomly stumbled upon a brokenhearted princess outside Swamp Town that removed that status. Although she remained melancholy, my quest status suggests with enough love she'll recover.
There are huts all over with different interactions, this one rewarded me for donating to each temple
I'm still not sure where the main quest is, or which dungeons might lead to the greatest rewards. I have plenty to explore. I'd really like to find a permanent speed boost to ensure my full party can act before the likes of that gargoyle can lock me down--at least I've found a fountain to get me by. Most dungeons aren't limited to a 16x16 map, making exploration of take longer than expected. It also makes looking at the full map impossible since I'm not making my own. A small price to pay for the hours of time saved. Hopefully it doesn't come back to bite me in some way.

Elapsed Time: 20h46m (Total Time: 33h43m)

Monday, July 17, 2017

Game #71: Might and Magic III: Isles of Terra (SNES) - A Glitch in Timing

Game 71

Title: Might and Magic III: Isles of Terra
Released: Jan 1995 (1993 TG-CD)
Platform: SNES
Developer: Iguana Entertainment (New World Computing [PC])
Publisher: FCI
Genre: RPG
Exploration - First-person
Combat - Turn based
Series - Might and Magic

I might be playing this game, at the very least this version, a bit early, but I have a good reason. I have a policy of playing any version at the time of the first release, and that's what I'm doing here. The TurboGrafx-CD version is incredibly expensive and difficult to find, and I couldn't confirm it had mouse support (or if the TG even had a mouse released in the US). As one of the few SNES games to support the mouse, I felt this would be the better experience. I'm not sure why then I decided to use a controller instead, but I'll attribute it to trying out a different experience.
Only one save game is allowed
Like most Might and Magic titles, the majority of the story is in the manual. It follows a band of adventurers as they seek ancient ruins where a scroll was said to reside. Sheltem was once again behind some brewing evil about to unleash on the world. As I began, it was unclear what this story had to do with the party I controlled. Starting year is 500, this game appears to be a prequel.
*Plop*
Every new game begins with the premade party standing in front of the inn in Fountain Head. It's not a bad group, but I always feel better creating my own characters. The roster is restricted to 10, so I deleted the original (getting their items beforehand) in order to create a new full party. To create a character I selected character portraits (race and sex that are locked to these), stats rolled randomly with the option to swap them, and alignment (good, neutral, evil) that only comes into play with equipment in this series.
Unless gnomes are supposed to be green I have a feeling they mixed up the portraits
Available class is determined by the character's current stats. Classes come in a normal variety of fighter (barbarian), cleric, thief (robber), mage (sorcerer), and druid in this game with the addition of hybrid classes of each one with a fighter for knight, paladin, ninja, archer, and ranger. I don't know if it'll become necessary to have one of each. There are also mercenaries in each town. They take up one of the six positions in the party though, so I'm not quite sure what use they are at this time.
I'm not sure if it's just this version, but the party begins in an obscene amount of gold and gems
With the party fully formed (knight, paladin, cleric, robber, druid, sorcerer), I set out exploring the first town. I quickly found Fen's Fineries, which sells additional equipment. I bought a second bow, and outfitted everyone with additional armor (so far I know of helms, gloves, boots, chests, cloaks, and shields--there may be more). The manual is light on information about equipment; about the only thing it covers in any detail are spells.
Noting the location of the temple before I need it
Fountain Head also has a tavern, training ground, bank, and magic guild operating on a day/night cycle. Time progresses only when taking actions, which remains true even when distant monsters appear on the display. There are also fountains throughout that ooze green slime. At a prompt I threw a coin into one, and a group of three bubble men appeared assaulting the party. I fear some sinister force is behind this. Not too difficult, I repeated the process until I had enough experience for level 2.
Getting a tip from the tavern keeper--make sure not to "eat" too much otherwise the character gets "stuffed"
While exploring, the party has options in the side panel to shoot arrows, cast a spell, rest for 8 hours to replenish HP and MP, bash forward, dismiss a character, consult quest log, view the auto-map (if a character has cartography--which is easy since there's a skill teacher near the bank), check the time, and get a status overview of the party. Selecting a character portrait brings up additional details on that character and their inventory. The gem on the bottom of the main display opens the system menu to save and load the game. The gems in the corners indicate elemental resistances for the party, and the gargoyle faces in clockwise order from the left indicate an active levitate spell, nearby enemies if a character has danger-sense, and likewise secret doors if a character can sense them.
HP of characters and enemies are displayed as colors: grey > Max HP, green = Max HP, yellow < Max HP, red = near 0, blue <= 0 HP
Characters that drop to 0 HP or lower are potentially only unconscious. They're only dead once their portrait is replaced by a headstone. There are gates throughout the city that only open with a good bashing. Bashing down a door takes a skill check of the first two conscious characters to succeed, and whether successful or not damages them in the process.
It took me way too long to find the exit as I thought it was merely another door to bash down
The menu changes to combat options when enemies are within melee range: attack, cast, use item, run (per character), and block. There is also an option to set a default choice for each character to streamline combat a bit. During these early battles I haven't found a need for anything other than attack. Unlike previous Might and Magic titles, gold and item rewards from combat are given automatically once all enemies in the area are vanquished. Some enemies, like the bubble men, don't give any reward. So far, these early enemies drain resources far faster than I'm rewarded. Hopefully things balance out eventually. Unfortunately, I haven't made much progress in the game due to a strange bug. I had trouble determining the cause as I couldn't find anyone else that wrote about it online.
The game can potentially lock up and wipe the saved game
At first I thought it was the cart, but I tried the same cart again.
I had to go back through the videos before I noticed it always happened after the same action
I ordered a second cart. It happened again, which had me thinking it was my SNES.
I wonder which part of memory this is...
I then tried on emulator, and reproduced it there.

I definitely wasn't expecting this, but it helped determine it wasn't related to my hardware
It was then I went back to the videos and confirmed it always happened when I used the shoot command after moving, but not every time. I think using a mouse prevents it completely due to timing differences with the input, which would explain why there's no info about it online. So, because I decided to try something different by using controller, I lost weeks of progress, but uncovered a bug no one seems to have discovered or at least bothered to log online. Word of advice for anyone playing this version: use mouse, it's faster and doesn't have this issue (so far).
I re-rolled my party for hopefully the last time as I consider just burning the whole place down
Having some more experience with the game I adjusted my party to knight, ranger, archer, ninja, cleric, sorcerer. I feel like this combination will serve me a bit better. I've already been taking down enemies quicker with arrows fired by the archer. Burning the goblin infested wagon rewarded me with experience and some magical equipment (including a belt of luck).
I wonder how necessary the quests given by the fortuneteller will become as they aren't logged in the quest log
One of the biggest changes to the series is the addition of quests tracked in a log. The game begins with one regarding Fountain Head and the cleaning up the green ooze, and I've been focusing on clearing out the caverns below town to rid it of the ooze. As I explored I found two other quests: ultimate orbs of power are requested by King Righteous of Castle Whiteshield, and 5 silver skulls are necessary for some ritual by an aged man named Skull Miser. As I've been clearing out the caverns below the town I've found those skulls slowly, and expect to have all five by the time I finish.
There are also some vague quests such as this... I'm sure I'll learn more about them as I proceed
Inside the caverns below Fountain Head were bats that poisoned, barrels to search, and completely visible unavoidable traps that taunted me as I had to walk through them . The bats were fairly weak yet quick, and often acted before I could. Their poison, and possibly all poison, drains stats rather than hit points. Cure poison is an 8th level spell, far out of reach. Barrels usually have gold, although some have permanently increased stats, and still some are damaging or instant death. Wanting to ensure the increased stats went to the relevant class, I started saving before the barrels and loading if, say, my knight gained wisdom. A potential problem presented itself, doors I had bashed were shut again when I loaded. This, coupled with poison that drained my might, meant I could "soft lock" myself behind one of these doors leaving the only way out my last resort of contacting Mr. Wizard. Calling on this power returns the party to Fountain Head at the cost of 1 level per character, not too bad at this low level yet still a pain. I think now I'll avoid the possibility by only saving in towns.
I have 20K gold and 300 gems in the bank accruing interest
By the end of this last session I've finally caught up to all I did through all the other false starts, and then some. A game can go so quickly when you have a little knowledge. Like knowing my sorcerer can't forgo a weapon and hold both a mind whistle and fast horn.
Identifying an item is the only way to know exactly what it does, and costs 10% of the price of the item
Now with all that trouble out of the way I can start enjoying the game. This is the first where auto-mapping is so prevalent that I'm risking not making my own maps. I am taking notes of interesting locations, but the auto-maps seem to stick around indefinitely. Making my own maps, while enjoyable, would take up even more time.

Elapsed Time: 2h32m (Total Time: 12h57m) [yes, that's 10h25m of false starts--I'm not sure if I should continue to count the full time.]

Wednesday, July 5, 2017

Game #70: Great Greed (Game Boy) - The Road to Hell (Finished)

Game 70

Title: Great Greed
Released: April 1993 (September 1992 JPN)
Platform: Game Boy
Developer: Namco
Publisher: Namco
Genre: RPG
Exploration - Top-down
Combat - Turn based
Series - Standalone

When I started writing up my list of RPGs, I didn't think much of the Game Boy titles (well, aside from the Final Fantasy games). Yet, I've been impressed time and time again by just how much the developers were able to cram into a tiny cartridge. This is no exception. They also manage to be just the right length.
The ending actually stretches all the way back to the title screen
The story is presented as pro-environment with the main antagonist, Bio-Haz, polluting an alternate dimension called Greene Kingdom. Its most powerful wizard Microwave escaped throw dimensions after battling Hunter, and she appeared before the story's hero. Hunter was quick to pursue. A second jump back to Greene caught the hero up, dragging him through space and time.
*Plop*
The game begins with a choice, carry Microwave to safety or leave her there. Like most choices in this game, it's a choice to continue the game or not. It's strange that they decided to sprinkle so many throughout. Carrying Microwave back to the Greene royal family's hideout, where they reported to the king and queen, it was revealed that Microwave lost her dimensional powers in the fight. To return home I would need to travel to Burger and retake Greene Castle to retrieve a magic book.
The English translation change all the names -- I think we have Jim Curry to thank for that, someone enjoyed their food references
While trying to figure out what to do, Bio-Haz's forces attack. We find that the hero's strength is much greater than the enemy. It's explained away by suggesting all humans from his world have greater strength in Greene.
The game has a strange way of describing dead soldiers
Equipment is basic; comprised of swords, armor, helm, and shields, they progress in nice linear upgrades by increasing attack or defense stats. Only the hero actively battles enemies, although when accompanied by an NPC she has a random chance of assisting in battle. Spells and items are also equipped for use in battle. Healing effects can only be equipped into the bottom slot.
Battles are always 1-on-1
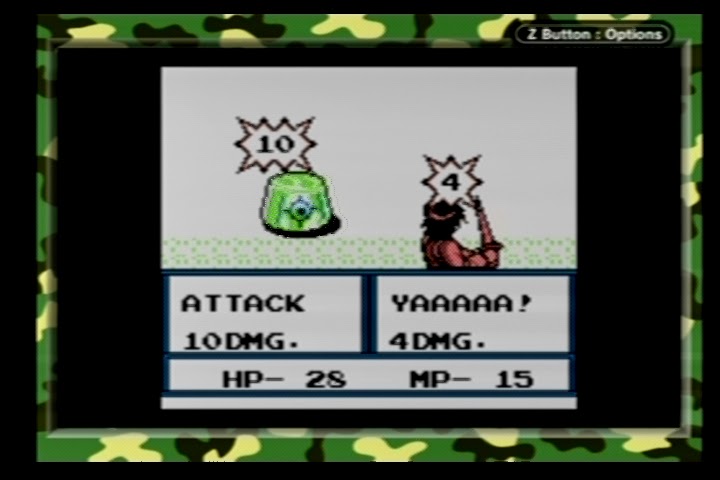
The combat mechanics of this game are unique for the time. Rather than a menu system, each button on the game boy is assigned to a different function: A attacks, B defends, start or select attempts to flee, and each direction on the control pad sets off the spell or item in that slot. For every action, the enemy acts, although there's also a hidden timer where the enemy will act if no action is taken for some time.
The next town is voting for a new mayor, and this guy is trying hard to win
The story is very linear, and missing a plot point meant being stuck until it was found. Princess Candy shoved us through a cave directing us to find her sisters along the way. In the land of Sushi I found princess Cup Cake trying to thwart the mayoral bid by Crabby. His rival, Cabbage didn't have the same financial backing, so we fought a bunch of enemies in his name to gain some good will. No matter how often we convinced the public though, the polling results always reverted to Crabby winning.
It must be the bribes
To find out more about the Crabby family, I traveled to the Condante Forest. A man named Condante agreed to help us if we could find the debut album of Lola Leftover from the abandoned record factory to the north. Inside we actually found Lola, who gladly provided her album after we listened to her lamenting song. She also mentioned some voices from the basement, which we explored with her lantern. There we found Bio-Haz's people conspiring with the Crabby family.
This is the first environmental puzzle I've seen -- the record spins you back, the objective is to jump on the head of the arm as it moves
Condante revealed that there were no records of a Crabby family, and they had faked their family name to garner praise for being famous. Combined with the plot to release pollution through the new energy plant, we confronted Crabby. Each area ends in a climactic boss battle. Crabby was a bit of a pushover, but as the game progressed the difficulty for bosses spiked quickly up.
Taking the bribe from Crabby results in a penalty after defeating him
Cup Cake escorted me to the border or Chow Mein, and directed me to find Dr. Bromide in Herbal Village. I found his daughter Lolly Pop in his house, but was told to go to Tuna Village. There was a strange system of laws in Tuna where three laws were picked at random each day. A law had changed, and sent Dr. Bromide to jail.
The laws the day I arrived prevented me from looking for Dr. Bromide in jail
The third law was stuck, and I needed to fix it to progress. A man next to the laws accepted 100 gold to cycle the laws again instead of waiting a full day. Paying a second man 500 gold allowed me to enter and fix the machine by randomly raising or lowering three levers. Now able to talk to the guards and enter the jail I learned Dr. Bromide was moved to a different jail.
I had to travel all the way north for someone to tell me they would only let in Dr. Bromide or his daughter before I could ask Lolly Pop to join the party
The long treks back and forth ensured that I never really needed to grind for levels so long as I sparingly ran from battles. In order to get to the Dragon jail I needed a spicy golden pepper from a secretive group, and this is where Lolly Pop became key. Before they would hand over the pepper, I would have to defeat one of Bio-Haz's men in a nearby castle.
Finding the right combination of floating platforms to reach the top was a pain
Questioning the design choices for the castle, I nevertheless scaled it until I confronted Nikninja to take back the castle. The golden pepper was necessary to defeat the dragon guarding the jail. The jail turned out to be a work camp where the prisoners mined for high toxins. Sarg oversaw the operation, and was the turning point for difficult bosses. Luckily the game has a very forgiving auto-save feature, so essentially no progress is lost from a game over.
This was a really close battle, but Freeze 2 + med 2 turned out to be the winning combination of skills
We retrieved Dr. Bromide's research from him as he lay dying in the mine beyond Sarg. We took Springroll's climbing gear to reach the Curry nation (talk about author insertion). Princess Truffle was in the next village, and she decided that purity was Bio-Haz's weakness based on the research. She escorted us to Pipe Valley in search of Ralph Vader and the purest thing in the world. Pipe Valley was conservation area where all the monsters were protected by law. If harmed, the party is kicked out. To cross I had to flee from all encounters.
All I have to do now is go to Crater Lake beyond Nutmeg Village... I'm sure it'll be that simple
It wasn't that simple. Crater Lake had been polluted. Now noxious gas spewed from it constantly brought down by high winds. Truffle worked on making a neutralizing agent powerful enough to counteract the toxic waste while I searched for a way to reach the lake while the winds were calm. In the next town over I found everyone hopped up on an ultra hot flower that caused them to run around at high speeds. With some of the flower gathered from a nearby forest, I was able to race up the mountain to apply the neutralizing agent.
Rocks in the path stun the hero as he runs to the lake--at least I didn't need to collect a new flower each attempt
At the lake I faced off against Darts, which added a few more attempts to the mad dash for each loss. The water was anticipated to be key to defeating Bio-Haz, although no indication of how. I then traveled to the land of Spaghetti in search of the next princess. A resistance movement was forming, and Princess Citrus was at the center of it.
To prove my strength she challenged me to a duel
To assist Citrus, I joined her as she quested for powerful weapons. It just so happened one was a prize for a beauty contest in the next town. To enter, I needed to find three fruit for the coordinator Mr. Fifi to make Citrus a prime contestant. The forest was full of monsters that would steal the fruit as I collected it, but I finally returned with an apple, peach, and walnut. With the new dress, Citrus easily won the contest; however, the dress provided was too attractive, and all the men in the crowd prevented Citrus from moving. This was Fifi's plan all along, as a member of Bio-Haz he would strike down the leader of the resistance easily. However, the magic didn't affect the hero, and I vanquished him. Back at camp we found that the adjunct, Shrimp, had betrayed and killed everyone. We pursued, and gave him his due. It was a tough battle, but the weaken spell made a huge difference.
After the battle Citrus fell into a hole
In the next area I investigated the strange earthquake that opened the hole in the ground. Of course it was one of Bio-Haz's men, Cadmium, the commander of his hunters. I crossed the desert thanks to some cool mint leaves, and Microwave joined me in the village of Torte. To pass the guard waiting for me in front of Cadmium's cave, I had to fight my through an abandoned library below the town. Navigating the maze took some time, but I emerged with the Zap spell described in an ancient document. I confronted Cadmium, who offered me a place in Bio-Haz's army.
If you accept, Microwave destroys you, with fair warning
Strangely Cadmium became Cavity in battle. As per the new norm, this battle took a number of attempts to find the right combination of four skills. Microwave injured herself during the battle, and had to be carried back to town. We parted ways as she handed me the key to a ship to the south (I'm not sure how a ship operates with a key), which would finally take me to Burger. On the way, the ship exploded thanks to a trap laid by Cadmium. I awoke in Caviar Village somewhere in the Soup Empire in the home of Marcela and Pint. The local doctor instructed me to rest and rejuvenate in the hot spring.
Chests are sometimes filled with trash, which can't be dropped -- it clutters the inventory until "sold"
As I made my way through the forest I noted how easy the enemies were up to the hot spring. Why, I could probably beat them barehanded.
Oh, I see where this is going...
Spending time in the spring completely rejuvenated my strength. Without a choice whether or not to leave my equipment, I was at the mercy of having limited HP, and no spells, to deal with the forest creatures. By the end I caught up with the man who had my equipment, although I had to flee from most fights. Luckily Marcela came to my rescue. Turned out she was actually Princess Gum Drop.
Which programmer?
With the princess' special barrier, we crossed the Blizzard Mountain. It was a long path that all looked the same until we reached a small inn, allowing us to regain strength. A cave later we scaled down the mountainside to a village called Won Ton. There we learned that Burger was just to the south, but the only way to reach it was using a kite piloted by a crazy inventor. First though, I needed to see just how impossible it was to cross the cape to the south. Then it was time to rescue a child from a blizzard on the mountain Mr. Noodle had passed as I went to meet him. Turned out it was Pint Jr. trying to find Marcela/Gum Drop, so she stayed behind as I flew off the cliff.
Flying down to Burger
I arrived in the town of Trash. The town was so polluted most of the shops had closed down, and the exit was blocked. The tower of Dust Ball was guarded closely. After making a few rounds around the town, I walked into an abandoned building a second time to be confronted by someone named Lunch Box. He and Time Out introduced themselves as if I had met them before. They created a diversion while I entered the tower. At the top I defeated the evil wizard Thyme.
She revealed that Bio-Haz was actually a human trying to save that world by dumping all the waste in Greene--so why was his men digging up toxins in that mine?
The shops remained closed, but I was now able to leave town for the final confrontation against Bio-Haz. First I rescued the king and queen, who thought it was a good idea to return before Bio-Haz was defeated. His hideout was to the south through a flower garden that only the royal family was permitted to enter. In troubled times like this I'm not sure why such restrictions were still imposed, but I had received charms from all the princesses to indicate I was trusted. I met up with Cup Cake and Truffle in the next town where she coated my sword with the pure water.
Is this an untranslated text?
I ran from most encounters at this point as I wasn't quite sure where I could regain my strength. Gum Drop showed up to help me with her barrier, but quickly ran out of magic. I rescued Candy from the dungeon, and with her power confronted Bio-Haz. He really was powerful, and with two forms proved a bit too much to handle. I resigned myself to grinding up to about level 41. The hero gains experience from the first form, and a level up restores HP and MP to max, so timing it just right to gain that level is key to beating the second form. That and a whole lot of luck. Citrus showed up to help during the second form, but her damage was pitiful.
An actual choice comes right at the end
With Bio-Haz defeated, the kingdom is safe once again. The hero can now choose to go home, or stay and marry one of the king's daughters (except Gum Drop who's promised to Pint already). If you choose Cup Cake, who's only 11, the king will say she's too young, but you can wait around a few years. The king doesn't say anything of the sort when you pick Truffle though, who's only 15, so I wonder what the age of consent is for this kingdom. I tried to pick Microwave and the queen as well, but they weren't having any of it.
Neither was the king
Initially I chose not to marry any daughter, and returned to the human world. Due to differences in dimensional reality the hero had only been absent for an hour. To top off the never seen that before list, after the end screen the game includes a small reward.
Not just a sound test, not just a bestiary, but also a small bio profile for each princess

Elapsed Time: 9h25m (Final Time: 9h25m)

Combatant - Bosses are really what make the game challenging, but the number of strategic options offered is enough to ensure grinding is optional. It just takes a little exploring of spells not normally used, and a little bit of luck. Stats definitely play a role, and grinding can turn the tables.
Rating: 7
The bestiary comes complete with all stats--Bio-Haz's second form
Admirer - This section gets high marks for the customization options of skills, and the unique controls. There aren't any adjustable appearances, and only HP and MP increase on level up.
Rating: 5
A lack of a good upscaler means these screens look blurry, but the character sprites are really well done
Puzzler - There aren't any side quests, and not many puzzles. There is only a single solution through the game. The main quest is well laid out though, and it's difficult to get lost.
Rating: 3
It's hard to tell from some of these titles, but I think this is the right person to credit for the life size record player
Instigator - The story falls a bit flat on the environmental side, stating only that toxic waste is bad. I'm not sure how influential it would be on any kid. How they handled trash was cute for a while, but annoying by the final dungeon where nearly every chest had some. NPCs do well at pointing at the next area, but don't make the areas themselves feel alive. There aren't a lot of choices, and those there are don't lead to interesting consequences during the game.
Rating: 4
Time to lay out the moral of the story
Collector - There's stuff, some strange things I wasn't quite sure what to do with, but as far as I can tell the strange things are only there to be sold. While there is a limit to inventory, it'll take a while to reach. The economy has a strange balance. Not excessively over the top with gold, I was still able to purchase the best equipment as I arrived in town. There weren't many instances where I had to decide on some equipment over others. Strength is relative to cost, and equipping items will tell you for certain if it's more powerful.
Rating: 4
How about an item list?
Explorer - The graphics as I mentioned before are well detailed, and enemy sprites are some of the best on Game Boy. The music is interesting, I don't think I've heard anything quite like it. The world is fun to explore, but linearly scripted, so there's no point in exploring off the designated path. It's also chopped up into areas that prevent back tracking.
Rating: 4
Were these really all renditions of Chopin pieces, or did someone want to credit themselves as Chopin?
Final Rating: 27 [45%]

Overall a light fun game that surprised me with innovative mechanics even if the story didn't quite grab me. I'm not sure I'd claim this as a recommended title. It's a good challenge if you avoid grinding, and inoffensively short compared to most console RPGs.
What happens to his father if he stays in Greene?
I know updates have been lacking. I actually beat this game nearly two months ago, but I'm still in that funk where writing feels more like a chore than something I get excited to share. It might be the heat of the early summer, or the recent lack of exciting games. Add on top of that some issues I've had getting into the next game, Might and Magic III, and I just had to take a break for a while. We'll see if I can get back on pace, but if not, please forgive the lack of content and I'll update when I can. I'd rather update infrequently than force worse writing in haste. Even with the trouble I've encountered, I'm still looking forward to giving it another attempt.